Triple Layer Mud Pie

Leave a comment

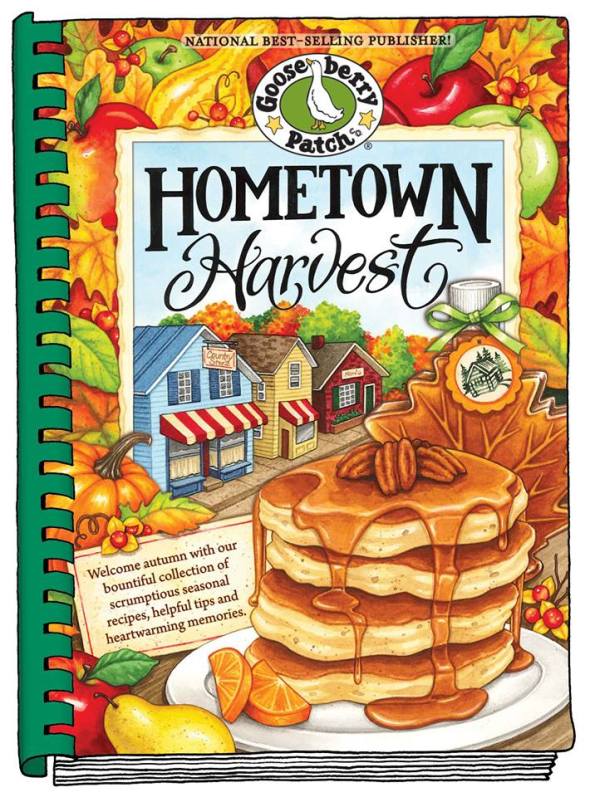
My third recipe from Gooseberry Patch’s  new cookbook Hometown Harvest.

GBP Hometown Harvest

If you are a chocolate lover like me, you will LOVE this easy pie.  I used sugar free products where I could and I purchased a Keebler chocolate crust.  I think it would be great on one of those purchased Oreo crusts, too.

I still take crappy pictures of pies ~ that hasn’t gotten any better 🙂

Mud Pie 1

Mud Pie 2

Triple Layer Mud Pie
Submitted by Beth Williamson, Wakefield, RI

3 squares semi-sweet baking chocolate, melted
1/4 cup sweetened condensed milk
9-inch chocolate pie cookie crust
1/2 cup chopped pecans, toasted
2 cups milk
2 small pkgs instant chocolate pudding
8 ounce container Cool Whip, thawed

In a bowl, stir together the melted chocolate and the 1/4 cup sweetened condensed milk and pour into the crust. Sprinkle pecans over the top.

Combine milk and pudding mixes in a bowl and whisk together for 2 minutes. Spoon 1 1/2 cups of the pudding over the pecans. Set aside.

Stir half of the Cool Whip into the remaining pudding and spread over the chocolate pudding in the crust. Top with the rest of the Cool Whip.

Cover and chill until serving time.

Makes 6 servings.

Happy Cooking!

My signature

Little Piggies ~ Hometown Harvest

Leave a comment

GBP Hometown Harvest

The second recipe I chose to make from Hometown Harvest is really a retro recipe. These were a popular party food in the 60s, 70s, 80s. Well, I still like them and make them for parties occasionally. They are always the first to go. I’ve made them for lunch once in a great while for my kids when they were still at home. Cut up hot dogs can be used instead of the smokies. I use all beef smokies and spicy mustard.  I haven’t made them in years so that’s why I chose this recipe to try.

Don’t forget to comment on THIS POST (PLEASE CLICK HERE)  for a chance to win a copy of HOMETOWN HARVEST generously donated by Gooseberry Patch.  Also, read through the comments already posted as there are some great ideas for fall cooking and some wonderful memories of fall.

Piggies 1

Piggies 2

LITTLE PIGGIES
Submitted by Kendra Hull, Sterling, IL

2 (8 oz) tubes refrigerated crescent rolls
1 (14 oz) pkg mini smoked sausages
Mustard or condiment of your choice

Unroll one tube of crescents and separate into 4 rectangles. Pinch seams together. Cut eacy rectangle into 4 strips. Place a sausage on each strip and roll up. I do mine a little differently. I cut the rectangles into 6 or 8 strips and roll up. I only use 1 tube of crescents and have a few sausages leftover.

Place seam side down on ungreased baking sheet. Bake at 375º for 10 to 12 minutes or until golden.

Serve with mustard or other condiment.

Makes 8-12 servings.

Happy Cooking!

My signature

NEW Gooseberry Patch Cookbook Giveaway!

209 Comments

GBP Hometown Harvest

A brand spanking new Gooseberry Patch cookbook, Hometown Harvest, is up for grabs.  Hometown Harvest is a great cookbook although I may be biased since fall is my favorite time of year.  This book has several wonderful chapters, Hometown Pancake Breakfast, Church Social Soup Supper, Thanksgiving Dinner to remember, Game Day Get-Together, Pumpkin Patch Sweets, Slow-Cooker Potluck Pleasers, and Over the River and Through the Woods.  All are chock full of wonderful recipes from home cooks like yourself.  I even have a recipe in this book ~ Buttermilk Pecan Waffles.  The last chapter is is full of  memories from readers and customers of Gooseberry Patch products.

After the recipe will be all the “rules” for this giveaway!

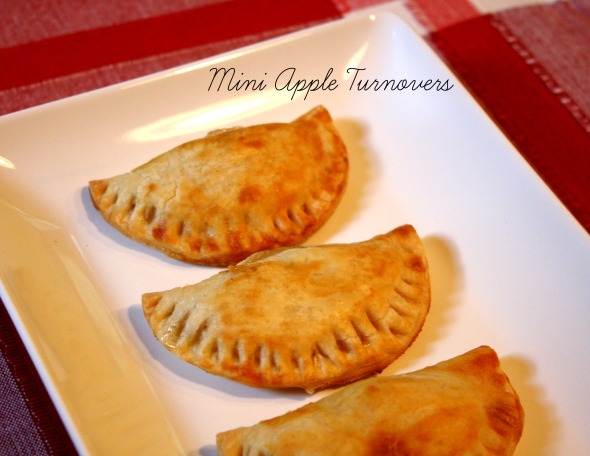
The first recipe I tried from this cookbook is Mini Apple Turnovers.  They are super simple to make and would be perfect for unexpected guests or for tea time.

Turnovers 2

Turnovers 1

Mini Apple Turnovers
Submitted by Robyn Stroh, Calera, AL

2 9-inch pie crusts, homemade or store bought
21 ounce can apple pie filling
1 egg white
1 tbsp water

Place one crust on a lightly floured surface. With a 3 inch biscuit cutter, cut out as many circles as you can. I used a slightly bigger cutter and got about 7 rounds from each crust.

Top each circle with 1 to 2 teaspoons pie filling, cutting up the apples if necessary. I placed my apples toward one side so it would be easier to close. Fold circles in half and crimp the edges wiht a fork dipped in water.

Place on lightly creased cookie sheets. Repeat with second crust.

In a small bowl, beat egg white and water together and brush over turnovers.

Bake at 425º for 8-12 minutes or until golden.

Makes 12-14 turnovers.

To enter the giveaway for ONE copy of Hometown Harvest all you have to do is comment on this post and tell me what your favorite food to make in the fall is. One comment per person. Very, very easy. The giveaway will run until October 3 at midnight. I will pick ONE winner on October 4 and I will email the winner! If you have any questions, feel free to email me at girard dot nancy at yahoo dot com.

Happy Cooking!

My signature

Cinnamon Roll French Toast Casserole

5 Comments

I saw this recipe in my news feed last week posted by Cupcakes and Crinoline and I knew right away that I was going to bake it for Easter brunch!  It was the right choice and we all loved it.  It has made it’s way onto my permanent brunch list of recipes.

The cinnamon rolls that the recipe calls for were a bit hard to locate but I finally found them ~ they are different than the usual Pillsbury  cinnamon rolls we throw in a pan and bake.  These  are rolled up like homemade cinnamon rolls.

Cinnamon Roll French Toast

To get this delicious recipe, click on this link ~ Cinnamon Roll French Toast Casserole.

Vintage Recipes Series ~ Cream Cheese Squares

9 Comments

I have a collection of old handmade recipe albums, recipe card boxes and a box full of recipes that I have been collecting for several years.  If I see someone’s recipe card collection for sale, I just can’t pass it up.  I feel bad that someone’s hard work collecting these recipes is being sold so I buy them and put on my bookshelf.  I have recipes from the 20s through about 2005 or so.  Some are not vintage but I have no idea what to call them.

Collection

Collection 2

Some recipes are written on the backs of envelopes and some are typed out neatly on cards.  It’s really a treasure trove of someone’s life in the kitchen.  It’s fun to go through them.

I decided that a few times a month, I would pick a recipe, make it, and blog about it.   Many of these recipes have no attribution or even a publishing date and are handwritten.  If it does have any publishing info, I’ll post it.  Except for the box of recipes that I have collected, I have no idea who even belonged to these boxes/albums.

Article

As you can see from the picture, the ingredient list in this recipe ~ Cream Cheese Squares ~ is a mess.  Luckily, there aren’t too many ingredients.  The recipe looks like it’s from the late 70s or early 80s from a column called Common Sense Cooking by Ruth McDaniel.  I did a bing search and it looks like Mrs. McDaniel has passed away.

These cream cheese squares are delicious!  They are cheesecake in bar form.  The recipe is easy however, saving 1 cup of the base to sprinkle on top is too much.  One-half cup would be plenty.

Cream Cheese Squares 1

Cream Cheese Squares

1/3 cup butter, room temperature
1/3 cup packed brown sugar
1 cup flour
1/2 cup chopped nuts ~ I used pecans
1 (8 oz) cream cheese, room temperature
1/4 cup sugar
1 egg
1 tbsp fresh lemon juice
2 tsps milk
1/2 tsp vanilla

Preheat oven to 350º.

Cream butter and brown sugar in a medium bowl. Add flour and chopped nuts and mix to make a crumb mixture. Reserve 1/2 cup and set aside. Press remainder in greased, 8-inch square pan. Bake 15 minutes until lightly browned. Let cool while you make the cream cheese mixture.

Blend sugar and cream cheese in a medium bowl with a mixer until smooth. Add egg, milk, lemon juice, and vanilla. Beat well until smooth. Pour over warm crust and sprinkle the reserved crust mixture over the cream cheese mixture. Bake for 25 minutes.

Cool and cut into squares.

I keep them in the refrigerator because I like cheesecake cold but the recipe doesn’t say anything about keeping them there.

Makes 9 bars.

Cream Cheese Squares 2

Cream Cheese Squares 3

Happy Cooking!

My signature

Banana Bread Muffins

3 Comments

Bananas are not my favorite fruit but I try to eat one a couple times a week since they are so good for you.  Consequently, I have lots of bananas that are on their way to yucky.

I came across this recipe while going through some community cookbooks and it turned out to be a great choice.  The muffins have great banana flavor and are nice and moist.  There is nothing worse than dry muffins.  I used cinnamon as my spice of choice since it’s my favorite and using a tablespoon did not make it too cinnamon-y. Mixing up some spices will work as well.  Just use your favorite baking spices.

Mr. Meat Eater ate them for breakfast for several days so they do keep for a 3-4 days in a container.  I think they would freeze well, too.

Banana Bread Muffins 1

Banana Bread Muffins 2

Banana Bread Muffins

Muffins:
1/2 cup butter, room temperature
1 tsp vanilla
1 cup sugar
2 eggs
3 ripe bananas, mashed
3/4 cup sour cream
2 cups flour
1 tsp baking soda
1/4 tsp salt
1 tbsp cinnamon, nutmeg, allspice or your choice of spice ~ you can also mix spices

Topping:
2/3 cup brown sugar
1/2 cup flour
1 tsp cinnamon
1/3 cup melted butter

Preheat oven to 350º. Grease muffin tins with cooking spray.

Cream the butter, vanilla, and sugar in a large mixing bowl until fluffy. Beat in the eggs. In a small bowl, combine the smashed bananas and sour cream. In another bowl, mix the flour, baking soda, salt and whatever spice/spices you decide on. Blend the dry ingredients into the wet ingredients, alternating with the banana mixture.

Spoon into prepared muffin tins. Sprinkle topping over the top.

Bake 20-30 minutes or until a toothpick inserted in the middle comes out clean.

Topping: Mix all the ingredients together and sprinkle on tops of the muffins before baking.

Makes 12 muffins

Adapted from:  Paws-itively Good Chow

Banana Bread 3

Happy Cooking!

My signature

Red Velvet Cream Cheese Brownies

3 Comments

Oh my ~ these are delicious!  I know red velvet everything is big right now and I don’t usually follow trends but this recipe sucked me in.   I actually made them around Valentine’s Day and I put the recipe aside and forgot about it until I downloaded the pictures and there they were.

I chose to try this recipe because it made the brownies from scratch ~ no boxed brownie mix was involved.  I am trying to stay away from boxed mixes especially since it’s so easy to bake from scratch without all the preservatives.  I also liked that it didn’t use a whole bottle of red food coloring like so may recipes do.  Be careful when using it because it turns everything red.  The only thing I did different from the recipe was to leave out the nuts.

Brownies 1

Red Velvet Cream Cheese Brownies

Brownies:
1 stick butter
1 cup sugar
1 tsp vanilla
1/4 cup unsweetened cocoa powder
pinch of salt
1 tbsp red food coloring
1 tsp white vinegar
2 eggs
3/4 cup flour
1/4 cup toasted almonds

Cream Cheese Layer:
8 ozs cream cheese, softened
1/4 cup sugar
1 egg
1/8 tsp vanilla

Preheat oven to 350º. Butter an 8×8 baking pan and set aside.

Brownie layer: Melt the butter either on the stove top or in the microwave and pour into a large mixing bowl. In order, add the sugar, vanilla, cocoa, salt, food coloring, and vinegar, mixing between additions. In an small bowl, whisk the eggs and stir into the cocoa mixture. Fold in the flour until combined. Stir in the walnuts if using. Save 1/4 cup of this mixture and set aside. Pour what’s left into the prepared pan.

Cream cheese layer: Blend the cream cheese, sugar, egg, and vanilla together in a medium bowl. Gently spread this mixture on top of the brownies mixture in the prepared pan.

Using a spoon, drop the remaining cocoa batter over the top of the cream cheese layer. Using the tip of a knife or a skewer, drag it through the cream cheese layer and the dropped batter to create a swirl effect.  Try not to mix in the brownie layer on the bottom as much as you can.

Bake for 30 minutes and allow to cool completely before cutting.

Makes 8 servings

Adapted from Food Network

Brownies 2

Brownies 3

Happy Cooking!

My signature


Chocolate Silk Pie for Pi Day!

2 Comments

Today is Pi Day (3.14) so I will post a pie.  As I have said many, many times, I am challenged in photographing pies.  I can’t cut them nicely to begin with and I just get mad and take a terrible picture.  Oh well.

This pie is so good and it helps that chocolate pie is one of our favorites.  Don’t leave out the coffee as it really adds to the chocolate flavor.

Chocolate Silk Pie

Chocolate Silk Pie

Pie:

1 baked 9 in pie shell
1 jar marshmallow cream
1 cup semisweet chocolate chips
1/4 cup butter, cubed
2 ozs unsweetened chocolate
2 tbsps strong brewed coffee
1 cup heavy cream, whipped

Topping:

1 cup heavy whipping cream
2 tbsps confectioner’s sugar

In a heavy saucepan, combine the marshmallow cream, chocolate chips, butter, unsweetened chocolate, and coffee. Cook and stir over low heat until chocolate is melted and mixture is smooth. Cool. Fold in whipped and pour into crust.

For the topping, beat cream in a large bowl until it starts to thicken. Add the confectioner’s sugar and beat until stiff peaks form.

Spread over filling and refrigerate for at least 3 hours.

Makes 6-8 servings.

Adapted from Taste of Home

Happy Cooking!

My signature

Strawberry Mousse

3 Comments

I love any flavor of mousse but so many of them use raw eggs that I don’t usually make them.  Yes, I know I can use pasteurized eggs but  for some reason, I don’t.  Anyway, this recipe doesn’t have any eggs at all.  It tasted like fresh strawberries which I loved.  I hate when I can’t taste the flavor.  It is also very easy to make.

A Strawberry Mousse

Strawberry Mousse

1 cup fresh strawberries
1 cup sugar
1 tbsp unflavored gelatin
1/2 cup cold water
1/2 cup hot water
1 tbsp fresh lemon juice
1 cup whipping cream

Place the strawberries and sugar in a blender and process until pureed. Let stand for 30 minutes.

In a bowl, soften the unflavored gelatin in cold water. Add the hot water and stir until the gelatin dissolves.

Add the gelatin mixture to the pureed strawberries and process in the blender to mix well. Add the whipping cream and whip for 5 minutes. The mixture will not whip up like whipping cream usually does.

Pour into 4 dessert dishes and chill for 2 to 3 hours or until set.

Makes 4 servings. I made 2 large servings instead of the 4.

Recipe adapted from Something’s Simmering

Happy Cooking!

My signature

Baked Mozzarella Sticks

6 Comments

Don’t forget to enter the Gooseberry Patch cookbook giveaway!  For a chance to win a copy of Weeknight Dinners, click this LINK and leave a comment!

First of all, I love the deep fried mozzarella sticks and while the baked sticks don’t come anywhere close to tasting like the fried sticks, they are a wonderful substitute.  Especially if you are counting calories or, like me, are too lazy to get the deep fryer out and mess with all that oil.

This recipe is easy but plan for all the freezing involved.  These sticks MUST be watched in the oven or they will melt.  I watched mine and couple melted very quickly so please keep an eye on them.

I found the recipe on Pinterest and it comes from a site called The Comfort of Cooking.

Baked Mozzarella Sticks

Baked Mozzarella Sticks

12 mozzarella sticks, cut in half to make 24 pieces
1 egg
1/4 cup flour
1/4 Italian-style bread crumbs
1/4 cup panko
2 tsps grated Parmesan
1 tbsp dried parsley

Freeze the 24 pieces of mozzarella until hard ~ about 30 minutes.

Place the egg in a shallow dish and whisk. Place the flour in a separate dish. Place the breadcrumbs, panko, Parmesan, and parsley ~mixed~ in a third shallow dish.

Line a baking sheet with foil and spray foil with cooking spray.

Working quickly, dip frozen mozzarella halves into the flour, then egg, then breadcrumb mixture and place on prepared baking sheet. Repeat until all pieces are coated. Freeze on the cookie sheet for 15-20 minutes until frozen.

While the coated cheese is freezing, preheat the oven to 400º.

When the coated cheese is ready, place in oven and bake 4-5 minutes. Remove from oven and turn pieces over. Return to oven for an additional 4-5 minutes.

WATCH STICKS CLOSELY because they will melt quickly.

Serve immediately with warm marinara sauce.

Makes 24 mozzarella sticks.

Happy Cooking!